
It is February 2017, and the 5.0 SLC has sadly languished for far too long. In the meantime, we have built a cool 1963 Volvo 122s “Amazon” for local rally events and moved the shop to a bigger space. But a challenge has been thrown down. Complete the 5.0 in time to run the car on the Snowball Rally, the last weekend of April 2017. There will be massive amounts of snow in the Sierra Nevada this year, so now is the time to make it happen!
While the factory 5.0 SLC rally cars did not have a sunroof fitted, the remaining homologation specials were the top end of the SLC range, and I believe were the most expensive Mercedes cars available in the model year. So most of these cars for sale to the public had all the bells and whistles, including an electric sunroof. When I got the car, the sunroof didn’t really work, which is typical due to age and hardened grease in the worm drive and runners. Besides, a proper rally car should have a solid roof. Hence, time to remove the sunroof mechanism and weld the panel opening shut.
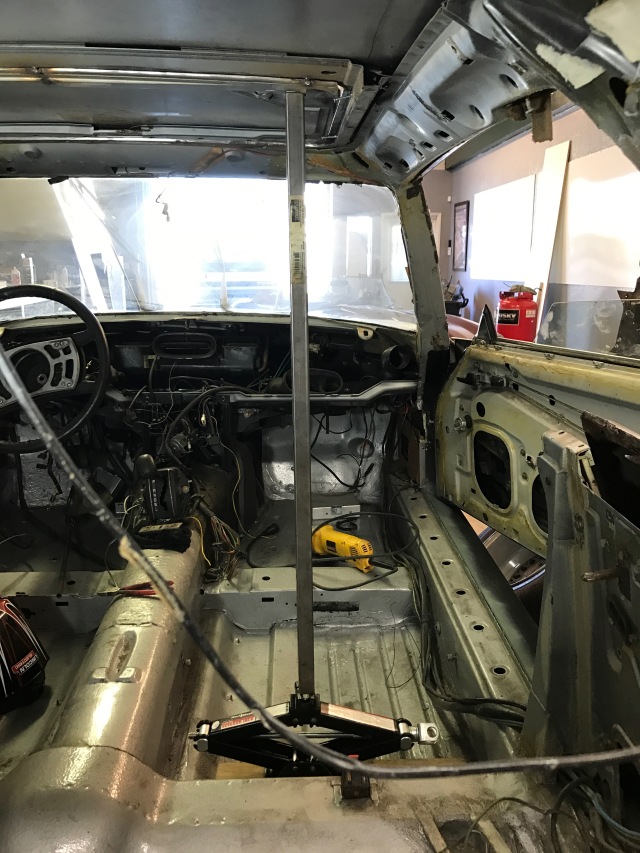
The first step is to remove the headliner and the sunroof panel. The SLC has a bulky and heavy metal frame that supports the sliding sunroof panel as it retracts. The inside looks like this once the headliner is removed.

This frame takes away a lot of headroom, and I would estimate that the frame, sunroof motor and other bits weighs about 30 pounds. Here is the frame once removed from the car.


Fortunately, after the sunroof seal was removed I was able to determine that the panel itself was not rusted. Thus, I would be able to use the sunroof panel itself to fill the hole, which was preferable to fabricating a panel out of sheet metal. The panel has a convex curve that conforms to the existing curvature of the roof, something that would be difficult to match with raw sheetmetal. Plus, the sunroof panel has a lip around it that I felt would keep it from warping under the heat of the welding process. Once I removed some of the hardware and bracing from the panel’s underside it would be ready to use.

The next step was to grind the paint off the edges of the sunroof panel and roof opening, then trial fit. I threaded four small screws into holes that formerly held the brackets on, in order to support the panel in the opening.

When it was time to get serious about welding the panel in, I obtained a number of large welding magnets to allow me to fine tune the fitment of the panel. When centered in the opening, the panel should have an even gap of slightly more that 1/8″. Check it all the way around.

The magnets do a great job of holding the panel in place, but getting the right vertical alignment is critical. Here I used a small scissor jack and a square tube section to position each corner of the panel at the right height relative to the roof as I tacked it in place. The rear of the panel has a large lip that extends under the edge of the roof opening. Start by locking that into place with tack welds.
The next step, once the rear was tacked into place and the front held up by magnets and the jack, was to feed 1/8″ steel rod into the gap, tacking in place gradually and bending the rod into the corners carefully.

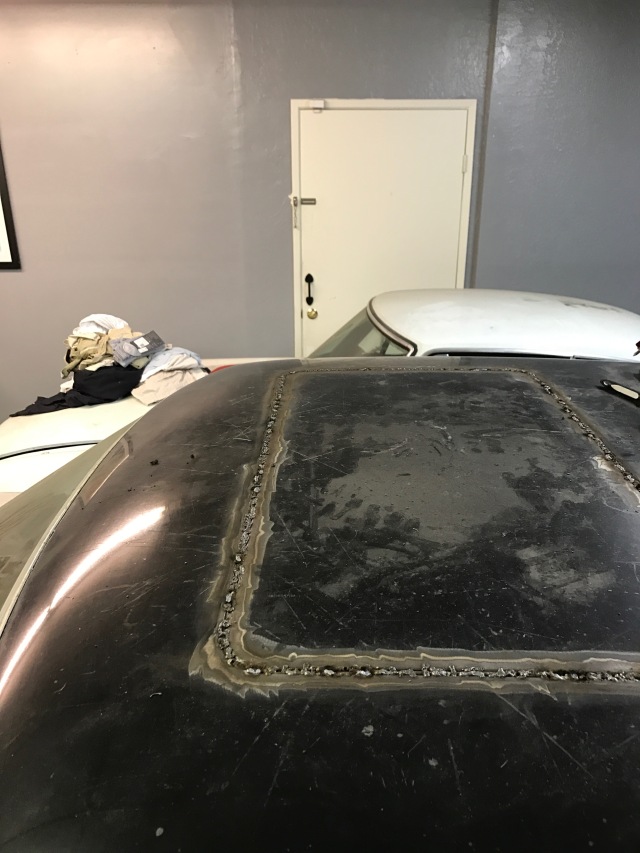
Once the steel rod is laid into the gap, tack it around, taking great care to space the tack welds apart each time to minimize heat into the panel. You can’t lay a bead while doing this, at the risk of warping the panel or causing it to “oil-can.” Over time, and plenty of it, you can gradually fill the gaps with tacking welds. This looks messy, but most importantly the panel still holds its shape without warping and conforms to the curve of the roof. The photos make the welds look like they stick up much more than they actually do.

 After carefully filling the gap with tack welds, I carefully ground down the weld seams with a flap disk on a 4.5″ angle grinder. Take care to also grind lightly, so as not to heat up the metal too much. Where grinding revealed a few areas that needed slight filling with a welder, I went back and did this, then ground down some more.


Next, I used the flap wheel to grind back the existing black paint and filler to create a clean metal strip about 3″ wide, then cleaned with aerosol degreaser and blew the joint out with compressed air to remove all remaining moisture and dust. Then, I laid filler into the welded seam only, let that cure, then started skimming layers on top of that to make the whole roof flush. Do this instead of laying one fat layer of filler, to make sure that no air pockets remain.


